
- How an Injection Attack Took us Offline, and How We Fought Back—Remediation and Prevention Guide
 Last week I had just published a highly visible post (the Analysis of #snc2009, the Social Networking Conference), and I was just starting to promote it when I discovered that Global Human Capital had been blacklisted by Google for distributing malware! This effectively branded us with the scarlet letter. Global Human Capital runs on WordPress, is hosted on Network Solutions’ infrastructure, but we ended up on the wrong side of the numbers on Thursday.
This post will be useful to blogmasters who may not think of themselves as Webmasters but who face the increasing threat of malware attacks, which are increasing geometrically. The time is getting closer when you or someone you know will be affected. I’m not an engineer, but I got hacked, and this is a quick resource in which I aim to cut your learning curve. It took me four days to figure out what had happened and what I had to do, which I’ll share below. I also include what I’m doing to prevent future attacks to my websites and blogs. I invite your comments and suggestions.
First I’ll explain what happened, how I got us back online and what I’ve done to prevent reoccurrence. If you have an emergency and want to skip the context, skip Anatomy of a Malware Attack, and go directly to the Malware Bootcamp. Think of this as a guide, as I’m compiled many useful links, too. Although it’s written from the perspective of using WordPress, LAMP, Mozilla, Google and Mac OS X, I’ll attempt to write it so it will be useful regardless of the tools you use to manage your blog or website.
The Anatomy of a Malware/Bot/Hack Attack
What Happens First
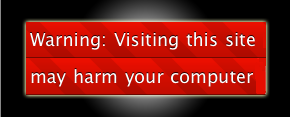
Out of nowhere, you get this nice little splash screen from Google-Mozilla (right). I clicked the “ignore warning” button because I first assumed it was one of those fake phishing pop-ups. When you click through, the screen continues to appear as you attempt to navigate the site. Okay, you relent finally and click the URL (“globalhumancapital.org”), which takes you to a Google page that is *very* spare on explanation. If you don’t have a Google Webmaster Tools account (free) or aren’t a techie, this will be annoying and frustrating. It probably won’t happen at a “good” moment. Note, this screen only popped using Firefox and Safari; Windows Explorer, Camino and Opera operated normally, even though malware was on my blog!
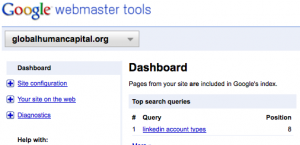
A friend of mine suspected that the warning wasn’t bona fide; it doesn’t look like a Google warning. In fact, this one results from collaboration between Mozilla (Firefox, Safari) and Google. Google is trying to protect people who (often) hit sites based on Google searches. When their crawlers encounter malware, that flags this warning. They do provide basic information on your Google Webmaster Tools Dashboard (click to enlarge).
Congratulations—You’ve Been Selected to Participate in Malware Bootcamp
At this point, unless you have a Webmaster or hire a security company, you have to throw down what you’re doing and find out what to do. There’s no easy fix. You are in for a crash course in site analysis. To get things right, you have to remove the malware and request Google to verify removal before they will retract the warning. How long this will take will depend on how prevalent the malware is on your site, what kind it is, and how fast you can remove it. There are few rules.
Here’s the procedure I went through:
 Find help. Finding good information about how to deal with malware is not as easy as it should be; there are few “automated tools” because malware is often *not* viruses, so virus scanners pass right over it. This guide will try to accelerate your process.
- Change the following passwords: your FTP and WordPress admin passwords. Max these out at 16 characters. If you have several blogs on WordPress, have separate username/password combos for each.
- Take your site down, which is easy (easy to put back up, too). How to do this below. You don’t want your site serving as a conduit or source for infecting readers or customers. Note, this will not remove the ugly splash screen.
- Find and remove the malware. This will probably mean text searching your files, certainly a laborious process and not what I wanted to hear. This may take hours or days depending on the nature of the attack and the structure and content of your site. Before you remove malware, print the code; it may provide clues that might be valuable later. Keep track of what files it was in and where it sat within the code. Be exacting about this; it will be the foundation of assessing how you were hacked.
- Ask Google to hit your site again; if they don’t encounter the malware, they’ll remove the scarlet letter. Do not do this until you have done the best job you can at finding all instances. Google will ask you about what you did to remove the malware. I provided a few sentences, not more, and that worked okay for me.
Critical procedural notes:
- Read this short guide before doing anything, which will give you an overview of the process.
- Keep records of whatever you do even though you won’t want to; if you are like me, you are focused on moving quickly, getting rid of that screen. Force yourself to do this.
- Realize that this will probably happen again, don’t think you got unlucky just once. There are thousands of new bots created every day, so it’s free and easy for them to conduct “campaigns”; malware and attacks will be increasingly common; think of this as “act one”; to minimize recurrences, you need to be very focused on what you’re doing and how you’re doing it.
- Try to determine how the malware got on your site, so you can prevent a reoccurrence.
- Organize your procedures into an actionable document. I am doing this here.
- Take notes for things you will have for your hosting provider, as you use this guide. You will have several questions, and organizing them before you call will mean fewer repeat calls and waiting on hold.
Remediation, Step by Step
Step One: Find Help
- If you discovered your attack through Google as I did, click through to the URL on the warning box. This will take you to Google’s analysis of your site, including some of the infected pages and some information about the malware.
- Open a free Google Webmaster Tools account if you don’t have one already. Use your preexisting Google credentials, or create a Google account. Having a Webmaster Tools account will help no matter what kind of attack you have. Google has a lot of resources, and they are hitting your site regularly. They provide feedback and early warnings. As bad is the splash screen is, wouldn’t you prefer to know you’re a malware source or conduit right away?
- Once your Webmaster Tools account is open, you will “Add a site” by pasting some code, given to you by Google, to paste into the header of your site or blog. For blogs, paste it into “html inserts” if your WordPress theme allows it, or paste it into header.php via your admin page’s “Appearance/Editor” link. Pasting the code into the header shows Google that you have admin access to the blog. Hit the “verify” link, and Google will give you more information about your site.
- Read 25 Years of Programming’s excellent analysis/remediation guide. Thanks to Gene Glaudell, who found it for me. It’s written from a Windows perspective and relies on Cpanel, which I don’t have, but it was by far the most useful and complete source I found.
Step Two: Change Passwords
As a Mac user, I use the leading password manager, 1Password, to generate and manage hard passwords; use something similar. When it comes to passwords, none of us are as tricky as we think we are. Network Solutions has a cap of 16 characters, so I generated random ones. At this point, you don’t know what happened or how they got in. Change:
- WordPress/other console admin passwords for everybody if you have several people with admin access.
- FTP passwords to your server.
- I didn’t do this, but also consider changing your database password; the malware could be loading into your pages from the database. My attack wasn’t like that.
- If you have a Windows machine, the possibility is far greater that someone installed a key logger on your machine, so realize that, until you can verify you have no key logger, your new password could be worthless.
Step Three: Take Your Site Down
- If you don’t have one, create an .htaccess file, and put it in the root (highest level) of your site or blog. This applies if your site is on the open source Apache web server, which most sites are. (If you aren’t on Apache, make a note to ask your hosting provider how to do this.)
- Create a blank document with a text editor; call it “htaccess.txt”; you will change the name later.
- Within the file, htaccess_code, and arrange line breaks exactly as shown.
- The two lines that take your site down are at the bottom, where they need to be: “order allow,deny” and “deny from all”
- Use the two WordPress lines at the top only if you use WordPress. Save the file.
- FTP “htaccess.txt” to the top level of your website (where the “index.html” is). This is the top (outermost) folder that contains your website or blog. The picture, right, is for Global Human Capital. The .htaccess file is at the same level as “wp-admin” etc. (standard WordPress folders).
- Using your FTP client, right-click on “htaccess.txt” and change its name from “htaccess.txt” to “.htaccess”; note that the “file extension” is htaccess, and there is nothing before the period. Hit return.
- Now, no one can access your site. When you have found and removed the malware, you will open the .htaccess file by removing the two lines “order allow,deny” and “deny from all”
- If you have an .htaccess file already, do this:
- Download a copy of “.htaccess” to your laptop; however, your computer may freak out and treat it as an invisible file. To avoid extra fun, before you download, change its name to “htaccess.txt” If you do this, now right-click on “htaccess.txt” on your web server, and change its name back to “.htaccess”
- Using your FTP client, right-click on the .htaccess file on your web server, which will ask you if you want to edit with a text editor (say yes). Add the two lines “order allow,deny” and “deny from all” at the bottom of the file. Make sure they are not enclosed within any html-type tags.
Step Four: Find and remove the malware
- Use 25 Years of Programming’s remediation guide. Don’t be distracted by their constant references to Cpanel, an excellent console for managing websites and blogs. To examine and work on your files, you will use some tool:
- If you have Cpanel, you can follow 25 Years’ instructions closely. I had used it before, but Network Solutions has its own console.
- If you do not have Cpanel, note to ask your hosting company to help you log into your console (the interface/tool for moving, reviewing and editing files) if you aren’t familiar with it. All hosting companies provide this.
- If you use your own FTP client (software for moving files from your laptop to your web server or vice versa), that can work, too.
- You might have a WordPress plugin for searching files, but I would not use it. If you are very experienced with it, go ahead, but I think it better to deal with your source files in the raw; you don’t want to miss anything here.
- You’ll note that we have already covered 25 Years’ Steps 3, 4 and 6. Make sure to do Step 2, and ask your hosting company how to do it with their tool if you have to. This will be key to finding all elements of the malware, now and in the future. Once you find the bad code and note the time of the attack, you can search your files for everything that changed at that particular time.
- Tell your hosting company that you are dealing with a malware attack, and ask what they can do to help you. Carefully note options. Have them open a trouble ticket. I got several conflicting stories from Network Solutions (“Netsol”). Some reps said that they would scan the files and remove the malware; however, other reps said that they did not offer this service. If you depend on them, realize you may be offline for days best case, unless you have a higher level of service than I, or you want to pay them an extra fee.
- Keep in mind that there are many kinds of attacks, so you won’t know exactly what to look for at first. The place to start is the Google Webmaster Tools report on your malware.
- It may help you to read about other people who are reporting similar problems. Here are some of the threads I read. I felt better knowing I wasn’t the only one, but these had little info on how to resolve .
- My attacker placed a malware script in the bottom of the “footer.php” file within my WordPress theme. The script was a conduit for other malware that was delivered by another machine when someone loaded one of my pages; consequently, their goal was to be as invisible as possible on my server. That one bit of code, though, loaded on every page. It would not have been found by a virus scanner.
- Even though you probably don’t want to spend time reading, take the time to follow the links on 25 Years’ guide; they are valuable and useful. Especially don’t overlook:
- How to Remove the “This Site May Harm Your Computer” Warning – on this page, study and use “How to search your pages for malicious code” and “Search strings to find malicious code” and “Which pages to search for malicious code”
- Warning Signs That Your Website Has Malware
- When you are searching and removing, don’t forget to keep records of what the malware was and where it was. Copy the code and save in a text file.
- Keep in mind that most of these attacks are carried out by bots, and each specializes in a different kind of attack. Although I’m not an expert, my perception is, once you have found the malware, there is probably only one kind on your site because most bots aren’t smart enough to carry out various functions. “Kind” can be located in different spots on your site, however. Once you find the first piece, use the malware code for your other searches.
- Select 10-20 characters of some of the most unusual code. If the 20 you picked don’t pop up, try selecting different pieces of the code.
Step Five: Ask Google to Remove the Splash Screen
- Once you think you’ve gotten it all, remove the “order allow,deny” and “deny from all” lines from your “.htaccess” file. Right-click on “.htaccess” within your FTP client or console.
- Use your browser to hit the pages that Google said were infected before. You’ll have to click through the warning screens.
- When you load pages, use the View/Page Source command (View menu) to look for the malware code that Google had previously reported. Do this for all the pages that Google reported with malware and others, too.
- If you still appear clean, use the Google Webmaster Tools page to “request a review” – tell them what you did to remove the malware. They removed my warning within a few hours.
- Change your passwords again! Depending on the kind of malware you had, the attacker may have acquired the passwords you set at the beginning of remediation via a key logger.
Security Precautions to Prevent More Malware Attacks
I still don’t know for certain how my attacker got through, but I recommend these steps to harden your site.
Step One: WordPress
- Amp up the security on whatever CMS (content management system, WordPress, Typepad) you use for your site.
- Hardening WordPress is especially useful.
- I downloaded and installed a couple of WordPress security plugins, WordPress Firewall and WP Security Scan.
Step Two: File Permissions
- The File Permissions section of Hardening WordPress has a useful rubric for file permissions. After my attack, I found myself wanting to close up really tightly, but I didn’t want my blog to stop working!
- File permissions can be daunting if you’re don’t understand object-oriented programming, but you can do it. I did.
- A good starting point to understand the concepts is UNIX file permissions and classes; it explains the significance of “user” vs. “group” vs. “world/public/other”
- You may also find slides 11-18 useful in WordPress: A Gentle Introduction
- Thus far, I am going 755 for folders and 644 for files.
Step Three: Leverage Your .htaccess File
- I already gave you the code for two of the preventions recommended by 25 Years. I will be looking for more. This is the equivalent to “cutting them off at the pass.”
Step Four: Login Procedure
- I have yet to resolve this, but I am determined to. I am a mobile worker, and I work with WordPress from many “open” networks. Although the probability may be against it, my credentials may have been sniffed and sold.
- If you work on open networks, your WordPress URL, username and password are sent in the clear (text) unless you are set up with SSH. Your options will largely be determined by your hosting provider and what you want to pay for.
- I am looking into something like Admin-SSL; hope to have up and running soon.
Step Five: Comments
- Of course you do this already, but we all have to deal with bots that put malware-infested “comments” on our blogs.
- If you’re distracted when you’re blowing through your comments, you might okay the wrong one and let the bot infect your site.
- I am doubly diligent now.
- Am looking for a tool that will help to automate this; I already use WordPress’s Akismet. It catches a lot but it’s not perfect.
Step Six: Feeds
- Malware might have come in via RSS, ads or anything else on your site that imports data from elsewhere; that’s why one of 25 Years’ remediation steps is turning all imports off.
- Just researching “malware via RSS” now; here are some initial resources.
Supporting Resources
- Global malware report: highlights global trends, from excellent source
- Although unstructured, you may find some useful things on my Malware collection on Pinboard.
- I will be adding more here as I find useful information. This will be a living document
- Please comment to ask questions and give suggestions to make this easier to use.
- Good luck!!
Thank you so much for writing such a valuable blog. I have been searching for days! Could you please clarify the exact code for taking your site down. I only have begin word press/end wordpress on my htaccess. It looks like you have a part where you add your own ip address – but I just wanted to check in with you before I rushed off assuming.
If its possible, could you please send me an email with the areas i have to insert about my own site in red colour
(or something like that). This would help me a lot.
I think i have many many files infected if I follow all the links you have given in this document.
Again, thank you so much for publishing it – it’s fantastic..
Many thanks
Gayle
Gayle, thanks for writing, and I apologize for the delay, strange circumstances, just seem to have survived two more insertion attacks.. hope you are okay and glad my post was helpful. I’m sure you’ve figured this out by now, but just in case, you need to insert these two lines at the very bottom of your .htaccess file–exactly as shown. They will take your site offline; when you are done remediating, just remove them and you’re open for business!
order allow,deny
deny from all
In case it’s helpful, here is a much shorter log of the attacks I just dug out from:
http://csrollyson.tumblr.com/post/450342270/malwareattack310
Have also sent this via email as you requested.
All the best